What Is Mudding and How Does It Work?
Mudding plays a key role in renovating walls and ceilings, even if it might feel a bit foreign to those just dipping their toes into the process. It’s about spreading a special compound over drywall seams and screw holes, smoothing everything out so the surface is primed and ready for painting.
What Exactly Does Mudding Mean Anyway?
Mudding is basically the art of spreading joint compound—often just called mud—over those seams where drywall panels come together. It covers up screw or nail holes and smooths out any rough patches that might be lurking. This step not only strengthens the joints but also creates that nice, even surface that’s all set for paint or wallpaper.
In renovation, words like "mud," "joint compound" and "spackle" often get tossed around as if they mean the same thing though they each play different roles. Joint compound, usually nicknamed "mud," is a gypsum-based paste mostly used for finishing drywall. Think of it as the go-to for smoothing things out. Spackle is a lighter, more nimble material made for quick fixes like filling those pesky nail holes that always pop up.
Why Mudding Matters in Renovation—And Why You Should Care
Mudding transforms rough drywall into smooth, sturdy walls that you can actually be proud of. It fills in those pesky joints and seams, giving the wall a solid backbone and a surface that feels pleasingly seamless and polished.
- It helps strengthen drywall joints and ensures they hold up solidly without weak spots that sneak in.
- Mudding covers screw holes, nails and seams to give your walls a smooth seamless look everyone loves.
- It cuts down the chance of cracks or gaps popping up along seams over time which is a real lifesaver.
- This step boosts the overall finish and leaves walls looking smooth and even like they were done by a pro.
- It creates the perfect base all set and ready for paint, wallpaper or textured finishes you might have in mind.
Materials and Tools You’ll Need for Mudding
Mud drywall like a pro by starting with the right materials and tools for the job. The star of the show is joint compound that comes premixed and ready to roll or as a powder you mix yourself—your call. Drywall tape, available in paper or the more flexible fiberglass mesh, helps lock those seams in tight. For tools, having a variety of taping knives in different sizes is clutch along with sanding blocks or sponges to smooth things out.
- Joint compound you can grab premixed for convenience or as a setting-type powder if you want it to dry quicker
- Drywall tape available in paper form for extra strength or mesh which I have found easier on the fingers and less fussy to work with
- A hawk or mud pan to hold your joint compound while you apply it
- Taping knives in sizes 6", 10" and 12" perfect for tight corners or wide-open stretches
- Sanding blocks or sponges to soften the dried compound between coats and avoid bumps or rough spots
- Mixing tools like a drill paddle or mud mixer especially handy if you start from powder and want to avoid lumps that slow you down
- Buckets or containers to help you measure and mix the mud just right because nobody likes surprises with consistency
Step-by-Step Guide to How Mudding Works (Because Every Wall Deserves a Glow-Up)
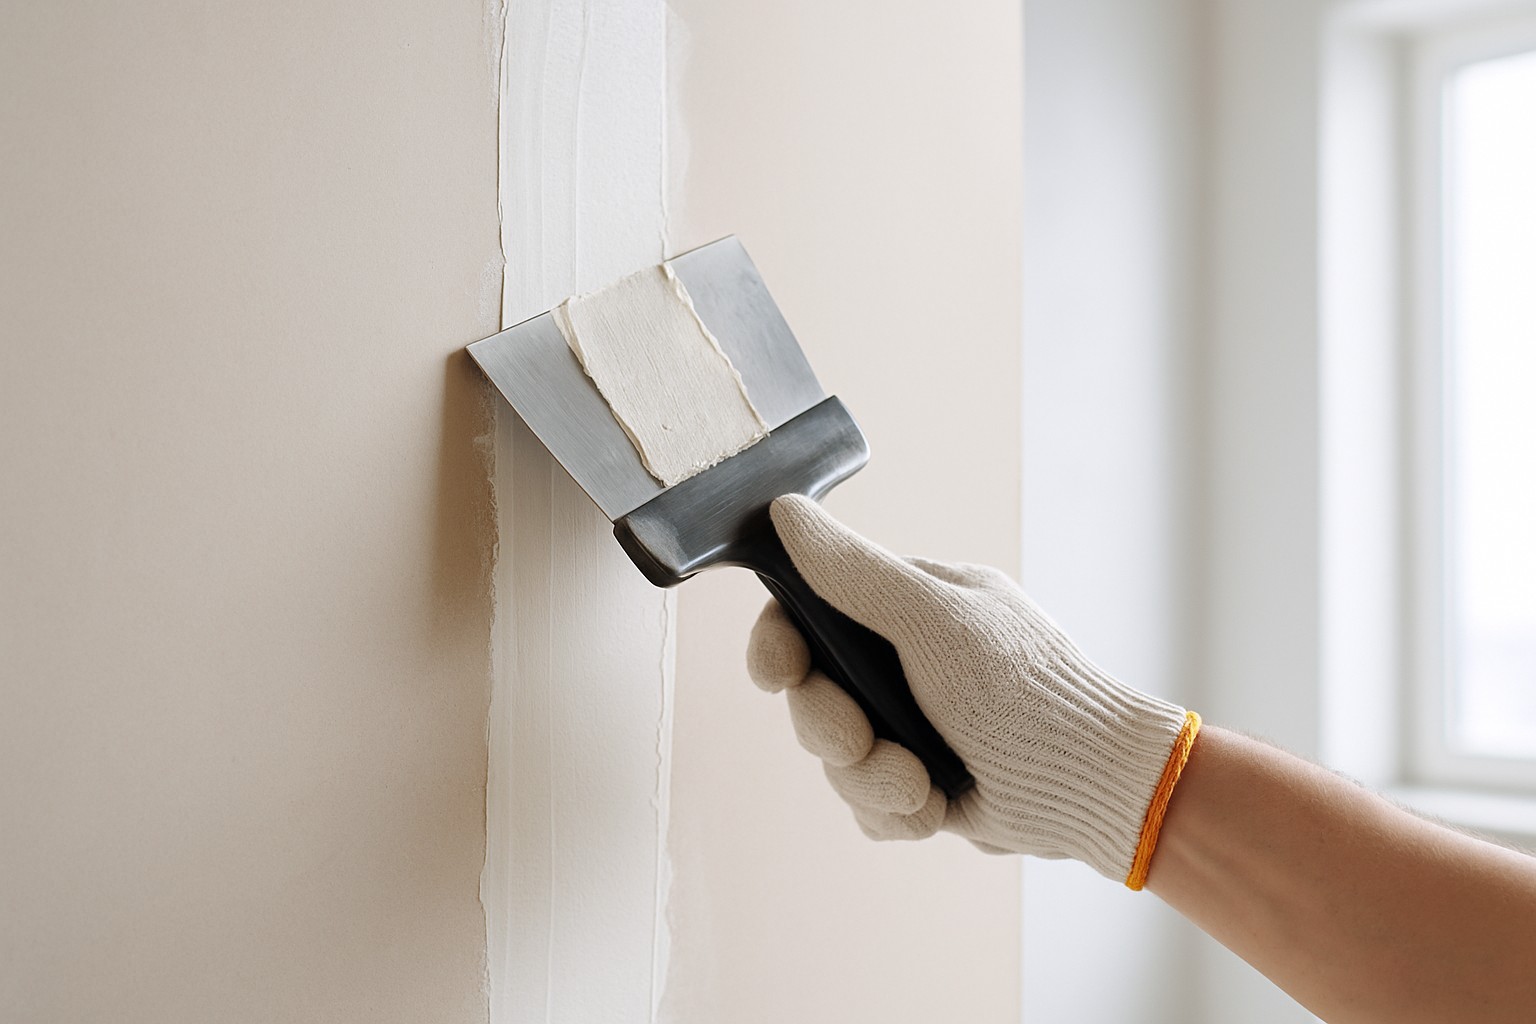
Mudding is a process made up of several well-planned steps that all play their part in creating a smooth, lasting finish. It starts with prepping the surface, followed by carefully applying mud in thin layers over seams and taped joints. After each layer dries, you sand it down to smooth out any pesky rough spots.
- Make sure the drywall surface is spotless and free of dust—this little step helps the mud cling like a champ.
- Grab a 6" taping knife and spread a thin first coat of joint compound over those drywall seams with a steady hand.
- While the mud’s still fresh and wet, press drywall tape firmly into place to cover the joints. Think of it as giving your wall a cozy little blanket.
- Use the knife to smooth out any pesky air bubbles or wrinkles in the tape because nobody likes a lumpy finish.
- Let that first coat dry thoroughly. It can take anywhere from a few hours up to a full day so patience is your friend here.
- When dry, lightly sand away any bumps or ridges but tread carefully so you don’t damage the tape underneath.
- Switch to a wider 10" or 12" knife for a second coat and spread it out to feather the edges and hide those imperfections like a pro.
- Once the last coat is bone dry, sand it carefully for a smooth finish that’s all set and eager for primer or paint.
Drying times really hinge on the type of compound you’re using, as well as the usual suspects like humidity and temperature. It’s a smart move to work in a well-ventilated, dry spot to help things dry evenly without any surprises.
Common Mistakes People Often Make When Mudding (and How to Dodge Them)
- Slapping mud on too thick or in a haphazard way usually leads to cracking and drags out the drying time longer than you would like
- Trying to hurry the drying between coats almost always ends up with poor adhesion and a finish that just does not hold up
- Skipping the proper surface cleaning is a rookie move that stops the mud from bonding like it’s supposed to
- Sanding too little or going at it like a maniac can wreck the tape or leave uneven patches that are pretty hard to fix
- Failing to embed drywall tape properly tends to leave those annoying visible seams and bubbles that everyone notices
These slip-ups usually result in cracking, visible seams or an annoyingly rough texture that kills the final look. Dodge this mess by going for thin layers and giving each coat plenty of time to dry properly. Prep the surface with care, sand lightly and make sure the tape is lying flat.
A Friendly Dive into Various Mudding Techniques
Mudding comes in different flavors depending on your project size and the finish you want. When working on small repairs or nitty-gritty details, using taping knives by hand gives you fine control—kind of like painting with a tiny brush. If speed is the goal, especially in new construction, spray systems can complete mudding work much faster.
| Technique | Description | Best Use Cases | Pros | Cons |
|---|---|---|---|---|
| Hand Application | Applying mud by hand using taping knives followed by sanding | Small repairs, detailed spots | Gives you precise control and saves a few bucks | Can eat up your time and definitely demands some elbow grease |
| Spray Mudding | Spraying mud over large surfaces with specialized machines | New builds, extensive areas | Fast application and a nice, even coverage every time | Requires special gear and might not win any precision awards |
| Skim Coating | Spreading a thin, smooth layer of mud across entire walls or ceilings | Refinishing surfaces, repairs | Leaves a sleek finish and hides those pesky big flaws | Needs a steady hand and can be pretty taxing work |
| Setting-Type Mud | Mixing fast-drying powdered mud right on site | Rapid repairs, patching jobs | Sets up quickly and offers solid durability | Working time’s short, so there’s little room for second chances |
| Taping with Paper Tape | Embedding paper drywall tape into mud to fortify joints | Typical drywall seams | Builds strong joint reinforcement | Demands skill to achieve that flawless, smooth finish |
How to Tell When Mudding Is Done and Ready for Those Final Touches
Knowing when mudding is truly done takes a keen eye and patience for the perfect smoothness and surface condition. The surface should feel solid to the touch with no soft spots or flaky patches trying to sneak in. Gently glide your hand over every seam like you’re giving it a little test. Make sure there aren’t any bumps or ridges overstaying their welcome. Visually, the joints and screw holes should vanish, blending in naturally with the drywall so they fool the eye. It’s a good trick to check from multiple angles and under different lighting because shadows and flaws hide in plain sight.
Mudding is a bit like polishing a gemstone. With every layer and careful pass, those little imperfections slowly fade away, revealing a surface that’s so smooth it almost feels like you could see your reflection in it. It’s a process that takes patience, but before you know it, your wall ends up looking flawlessly ready for its final finish.
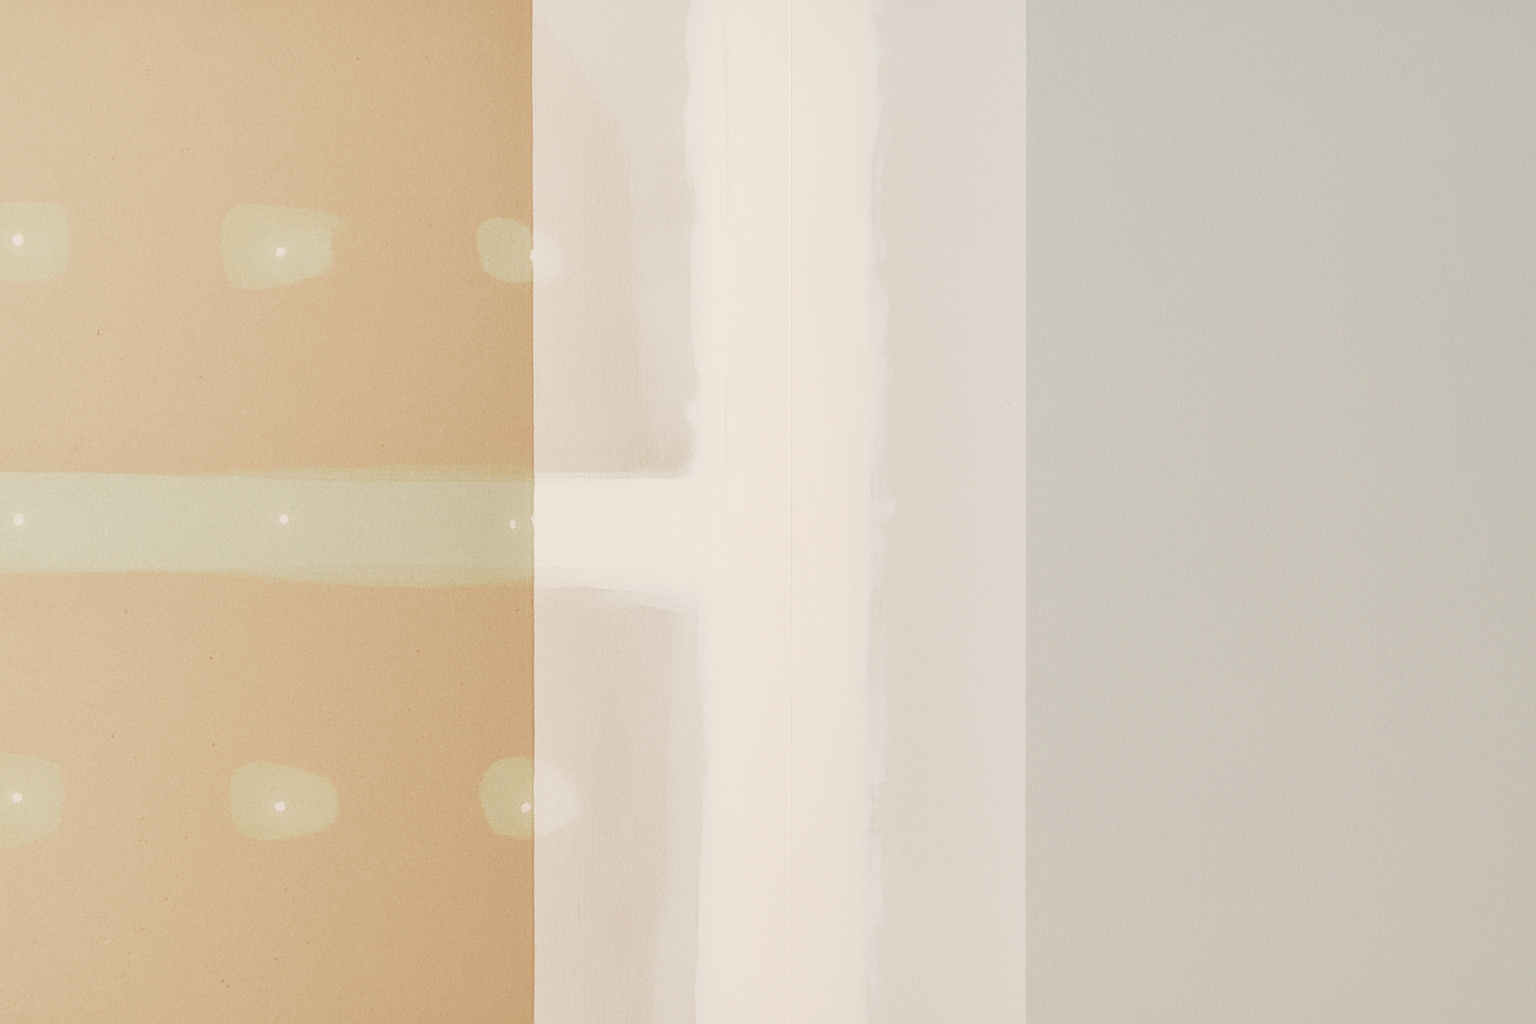
Illustration showing a before-and-after comparison of a wall section before mudding, after first coat, and after finishing sanding